Preface
This post describes: My success at cooling fan lubrication on an NVIDIA GeForce GTS240 PC display adapter to silence it when it became noisy.
Introduction
I ended up applying cooling fan lubrication to a NVIDIA GeForce GTS240 GPU (Graphics Processor Unit or Display Adapter) whilst looking for the cause of a PC error generated by it.
During the last couple of months I had some serious errors (about 4) reported on my HP Z620 PC.
These were two of the error reports:
- 928 – Fatal PCIe error. PCIe error detected Slot 2 Completion timeout.
- 928 – Fatal PCIe error. PCIe error detected Slot 2 Surprise link down error.
All the errors pointed to either a Slot 2 problem or a problem with my NVIDIA GeForce GTS240 Display Adapter in that slot. I hoped the problem (which is intermittent and very occasional) would go away if I reseated the Display Adapter in its PCIe card slot.
Read on to find out what I did next.
Opening And Cleaning My HP Z620 Workstation
There hasn’t been a reason to look inside my PC over the last two years. So I hadn’t seen how much dirt had collected in it during that time. However I am well aware how much dirt gets into PCs over a couple of years. So I was prepared to clean it.
Items required for this cleaning task:
- Powerful vacuum cleaner,
- Pipe nozzle attachment,
- Brush attachment,
- Small sash brush or paint brush to clear fluff from corners.
Opening Up The PC
Safety First – I began by disconnecting the mains cable.
As with many PCs mine requires removal of a side panel. My side panel has a lockable embedded handle which easily facilitates removal of the side.
As expected it was full of fluff. The fluff had settled mainly on the horizontal surfaces especially the bottom of the case. Some of the fluff could be sucked up using the cleaner’s brush attachment. Then I had to resort to using an artists paint brush and the cleaner’s long nozzle attachment.
Dismantling Parts of The PC
It’s a good idea to take photographs as you dismantle your PC so you can use them to re-assemble it correctly.
First I cleaned what I could easily get access to. Then I removed the three PCIe cards:
- Display Adapter in Slot 2,
- Sound Card in Slot 4,
- TV Card in Slot 6.
With these cards removed I could access the mother board to clean it more easily. I could also clean the three PCIe cards on all sides using a vacuum cleaner and brushes to get them spotless.
I use the NVIDIA GeForce GTS240 display adapter because it has two digital outputs capable of driving two monitors with digital inputs.
This display adapter has a complex heatsink with many narrow channels. These require access to vacuum clean them. Access is obtained by removing the top cover. That’s held on by seven very small screws requiring a Phillips #0 watchmaker’s screwdriver to remove them.
Below you can see three selections of screws taken from the GTS240:

The screws are listed below:
- 7 x small Phillips #0 screws for holding the heat sink cover in place,
- 11 x Phillips #1-1 screws for holding the heat sink to the adapter board,
- 3 x large head Phillips #0 screws for holding the fan to the heat sink.
The Importance of Cleaning Electrical Connections
I can’t emphasise how important it can be to keep electrical connections which have low voltages and carry low currents free from dirt. Any dirt on the gold plated edge connectors can act as an insulator if it wedges between a board connector and its socket. This will prevent normal operation and give errors.
While the PCIe cards are out, the vacuum cleaner nozzle should be applied to the slots of edge connectors to suck any dirt from them. Keep the paint brush clean so it doesn’t apply dirt and use it to waft any fluff out of the slots towards the vacuum.
Edge connectors that have never been used can be heavily contaminated with dirt. They are very much exposed to the fluff that settles in a PC, as are the other multi-way sockets on the mother board. They need to be thoroughly cleaned out before they are used.
Working On The Display Adapter

Initially I did just clean the display adapter and re-insert it into the PCIe slot of the motherboard. It was when I switched the PC back on that I had another problem. The fan on the display adapter was vibrating and making the adapter board resonate. This was all very audible.
I observed that the PC started as it should. There were no observable software problems which was good. I was concerned that the fan might grind to a halt in the near future. So I took the display adapter out of its socket again and played with the fan by spinning it around with my finger. If I spun it fast enough it would vibrate sometimes.
I wasn’t sure how the fan was assembled at this time. I tried to pull the rotor off. There was an element of flexibility as the rotor and stator moved apart but sprang back together when released.
I re-inserted the adapter again. This time it was a lot quieter and I put the side panel back on and considered the job done. However during the evening from time to time I heard small vibrations from it. I wasn’t happy.
I was convinced that the fan would be much better off if I lubricated the shaft. So I set about removing and dismantling the fan with a view to lubricating it.
Removing The Heat Sink From The Display Adapter
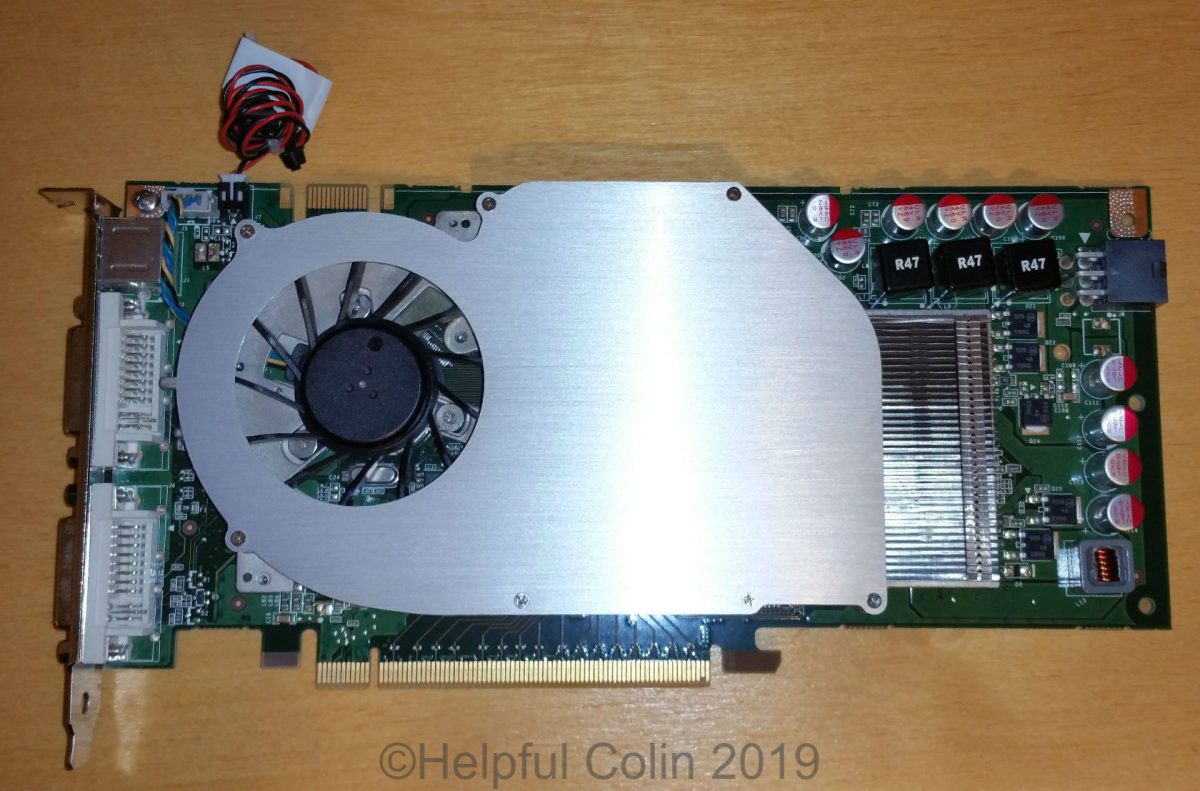
The fan on the NVIDIA GeForce GTS240 Display Adapter is fixed to the heat sink with three large head Philips #0 screws. It’s a centrifugal fan which draws air in at the centre and blows it out at the edge through the heat sink to keep it cool. The heatsink is bolted to the adapter board by several screws and connects thermally to several (processor and memory) chips to cool them. The eleven screws (Phillips #1-1) can be seen in the picture of the display adapter mounted in its PCIe slot below:

The screws are the sort with coil springs mounted under the heads. As I understand it the springs are expected to apply a gentle force to the heatsink. Consequently the screws should probably not be tightened or they will create a force greater then spring pressure. This is to pull it down onto the chips which have a flexible compound sandwiched in between. Eventually there will be the same heat transfer from each chip to the heatsink with this arrangement.
Ideally the compound should be renewed. In my case I didn’t interfere with it hoping it would go back as it was. I did tighten the screws.

I hoped that by removing the heat sink I would be able to access the bottom of the fan and remove the label to expose the rotor bearing. However I found that the label could not be accessed while the motor was still bolted to the heatsink. So I made a second attempt to remove the motor.

I had tried to remove the three screws holding the fan to the heat sink while it was still fixed to the board but the screws were too tight and I feared causing damage to something.
Separating The Fan From The Heat Sink

I had to persevere if I was ever to lubricate this fan. So with the heatsink firmly resting on the bench I used a Phillips #0 watchmaker’s screwdriver with a thick paper tissue pad on the end to protect the palm of my hand. Then with a lot of downward force to keep the screwdriver bit engaged with the screw and all the grip I could muster with my fingers I was able to remove two of the screws. The last one was, of course, tighter than the others and took even more torque to remove it.
I concluded, at first, that dissimilar metal corrosion was at work here, or a thread-locking adhesive was binding them, but I did free them and release the fan.
Having now taken these screws out more than once I have to conclude that friction under the large diameter heads of these screws is to blame. If I tighten them really tight they are extremely hard to remove.


There was a small plastic strip, held with another difficult to remove screw, which held the four motor wires in a neat fashion too. See below:

Examining The Motor Base For A Way of Applying Cooling Fan Lubrication
With the fan separated from the heat sink I carefully peeled the label off the back of the motor using a penknife. Disappointingly this didn’t expose the rotor bearing. It did however expose a chip and another component mounted on a board holding the drive electromagnets. See below:

I re-affixed the label and decided I needed to separate the rotor from the stator.
Prising The Motor’s Rotor & Stator Apart
I chose to prise them apart as shown below:


To do this without breaking anything (in particular the ferrite magnetic ring inside the rotor) I needed to apply equal forces between the rotor and stator from two opposite sides. So I wedged two identical flat bladed screwdrivers between the rotor and stator on opposite sides and rotated them together. Using two screwdrivers at the same time kept the shaft straight. This worked and, after a springy sensation, I felt the rotor separating from the stator.
After the two screwdrivers were rotated through 90° I could see inside the motor. This action raised the rotor by 4.5 mm. I felt confident they would come apart without breaking because I hadn’t used much force to get that far. I gripped the rotor and stator with my fingers and continued to pull. The rotor came away from the stator leaving them totally separated.
The rotor and stator are shown below:


The Act of Applying Cooling Fan Lubrication
When I pulled the fan motor rotor and stator apart they were heavily contaminated with extremely fine dirt. There had been a lot of fine dirt under the heat sink. This was probably from a time when the display adapter had been used in my previous PC. Using the paintbrush and vacuum cleaner I was able to remove all I could see.

The shaft of the rotor has a domed head like some panel pins. This holds a small white plastic washer and brass/bronze bearing on it. The bearing pushes into a plastic tube in the centre of the stator and holds the two parts together.
All I had to do was lubricate the shaft with very light machine oil and reassemble the motor by pressing it together with my finger and thumb.
I used an oil applicator which has a 1.0 mm tube for the oil to exit and a squeezable tube for its body whilst lubricating the heat sink fan.
The adjacent picture has a small drop of oil on the outside of the 1.0 mm tube. It’s handy to have a tissue to mop up any oil that leaks out. The applicator does come with a push-on rubber cap to keep it sealed.
Reassembly After Applying Cooling Fan Lubrication
Remember those photographs taken as you dismantled your computer. Well this is the time to review them.
As with so many dismantling processes the reassembly process is a series of reverse actions always remembering not to overtighten anything.
Finally
Be assured I am not suggesting that the errors shown by the messages I mentioned at the beginning of this article were in any way caused by the fan, or that its lubrication was a fix. I applied cooling fan lubrication just because it had become noisy.
As a consequence of writing this article I have needed to dismantle the Display Adapter more than once to take photos not taken the first time.
On one occasion I forgot to reconnect the wires of the fan. This resulted in overheating of some chips to the extent that the heat sink got too hot to touch. Fortunately no permanent damage was done as far as I can tell. However the overheating did result in the 2nd error messages I previously received:
- 928 – Fatal PCIe error. PCIe error detected Slot 2 Surprise link down error.
So maybe an overheating problem was the cause. Time will tell.
Here’s the overclocker’s approach to applying cooling fan lubrication to computer fans.
Leave a Reply