Introduction
I’ve been thinking of obtaining some air conditioning equipment for the last few years since 2018. But this year (2022), with exceptional heat forecast and my son taking similar action to cool his London flat, I went ahead and bought an AEG CHILLFLEX portable air conditioner.
It arrived on 12th July 2022 in time for the first UK Met Office “High Temperature Weather Warning”. This was issued for the 18th and 19th July 2022 when temperatures were expected to reach 40°C. In fact a national record of 40.3°C was set at Coningsby in Lincolnshire. That is only 88 km (54 miles) from my home.
The Size of My Portable Air Conditioner
I decided to cool one particular reception room during the daytime. It’s a room with two large settees one of which converts into a sofa-bed. So we could sleep in there overnight if needs be, and during the excessive heat we did.
The lounge dimensions are 3.5m × 4.3m = 15.05m2 with a volume of 34.6m3. The floor area is below the AEG CHILLFLEX portable air conditioner floor area capability of 24-36m2.
This is the room I fitted a large vertical radiator in. See my post, “How I Hung My Vertical Radiator In The New Lounge.”
I had to make a quick decision so I could get on with the work to install it in time for the heatwave. I chose an AEG CHILLFLEX AXP34U338HW Portable Air Conditioner and had it supplied by AO.com; (my son had chosen a De’Longhi model).
My Plan for Installing The Portable Air Conditioner & Its Hot Air Exhaust Pipe
I didn’t know much about portable air conditioners before I started on this venture. So I had to find out how best to deal with the venting of hot air from it when it arrived.
I did know beforehand that it only came with a 1.5m ⨯ 150mm dia. exhaust hose (when fully extended). It’s only long enough (when it has two right angled bends in it) to output through:
- a window at a point below 1.7m,
- a pipe built into a wall below 1.7m,
- low level windows for which adapters are available, e.g. AEG Adapter.
AEG’s view on the venting process.
AEG’s view on draining internal condensation.
The area I wanted to cool had some opening transom windows through which I could extract the hot exhaust.
I needed to have it passing through one at the top of a window frame. So I obtained a 2m ⨯ 150mm dia. exhaust hose, from another supplier, which could probably serve an outlet up to 2.2m high. This hose had an identical construction to the one provided by AEG.
Although I followed the manufacturer’s operating instructions, I had to use my own wits and devise a method of holding the exhaust pipe in the window opening without letting hot air from outside come in around it.
The AEG pipe terminal at the window end has a 150mm diameter opening for the spiralled hose to screw into at one end and an oval opening on the other end to connect to their suggested window fitment. (The window fitment is a separate purchase if required.)
The oval opening has a flanged edge which I trimmed off with a hacksaw leaving an oval tube 153mm ⨯ 64mm with a 38mm long projection. See the picture below.

Fitting Portable Air Conditioner Exhaust Pipe Baffles Into Transom Window Frames
I then chose to fit that into an oval hole in a plywood baffle board. This type of board is designed to hold the exhaust pipe up to the window opening whilst blocking (baffling) hot external air from entering through the remainder of the open window. I mounted in an open transom widow frame according to the following process:
- Open the transom as wide as possible and cut a rectangular piece of ¼” ply to fit into the frame that the opening window normally sits in.
- Cut an oval hole in the ply to take the modified (de-flanged) pipe terminal with a tight friction fit.
- Press the oval end of the pipe terminal into the hole cut in the ply.
- Twist the exhaust hose into the pipe terminal groove arrangement. NOTE: The pipe and grooves have a left-hand thread. This can be done before or after the terminal is fitted into the baffle. Whichever is most convenient.
You should be able to get the idea from this external view of the finished baffle board in the picture below.

I have a choice of sending the exhaust out of any of three windows since all the windows are the same height and two are the same (smaller) width. (The one in the toilet and shower room will probably not be used.) By cutting the ply to fit a small window I can easily move it to the larger window by adding an extension piece of ply to fill the gap.
The plywood baffle sizes needed to cover the openings of the two sizes of window are:
- For the small windows: 29cm ⨯ 65cm (11½” ⨯ 25½”),
- For the large window: 29cm ⨯ 77.5cm (11½” ⨯ 30½”).
Creating & Fitting The Exhaust Pipe Baffle Into The Small Transom Window
For once I used scrap timber and screws left over from other projects throughout.
I mounted two strips of timber, one (the retainer) on top of the other (the spacer) to create a hooking structure, along the top edge of the plywood baffle. This holds the top edge in place against the rubber window seal while the baffle is swung into place. Then the baffle is closed at the bottom edge in the same way as a transom is closed, by rotating it about the top edge. When in place the bottom edge is held by a central rotating toggle.
Below are two truncated end elevation diagrams showing how the plywood baffle is held against the transom window’s rubber seal, by the retainer of the hooking structure, at the top and a rotating toggle at the bottom.


The diagrams above are not drawn to scale. They just show the technique for anyone wanting to install their own Portable Air Conditioner in this way.
The Spacers must be exactly the same thickness as the adjacent part of the widow frame and seal. That allows the retainer and toggle to sit flat on the inside of the window frame. Their thickness is adjusted to allow the seal to be compressed slightly to make the plywood airtight.
Cutting The Oval Hole For The Portable Air Conditioner Pipe Terminal
The oval hole in the plywood is marked by drawing around the shape of the pipe terminal. Then many small holes (3 or 4mm dia.) are drilled close together on the inside edge of the drawn line. They are joined together by sawing with a junior hacksaw blade held while wearing a leather glove. The roughly sawn hole is then sanded smooth to the marked line with course and medium grade grit paper. Then the terminal’s oval tube fits into the ply until it butts up to a flange on the terminal. This allows exhaust to pass up the tube and out through the plywood baffle mounted in the window frame.
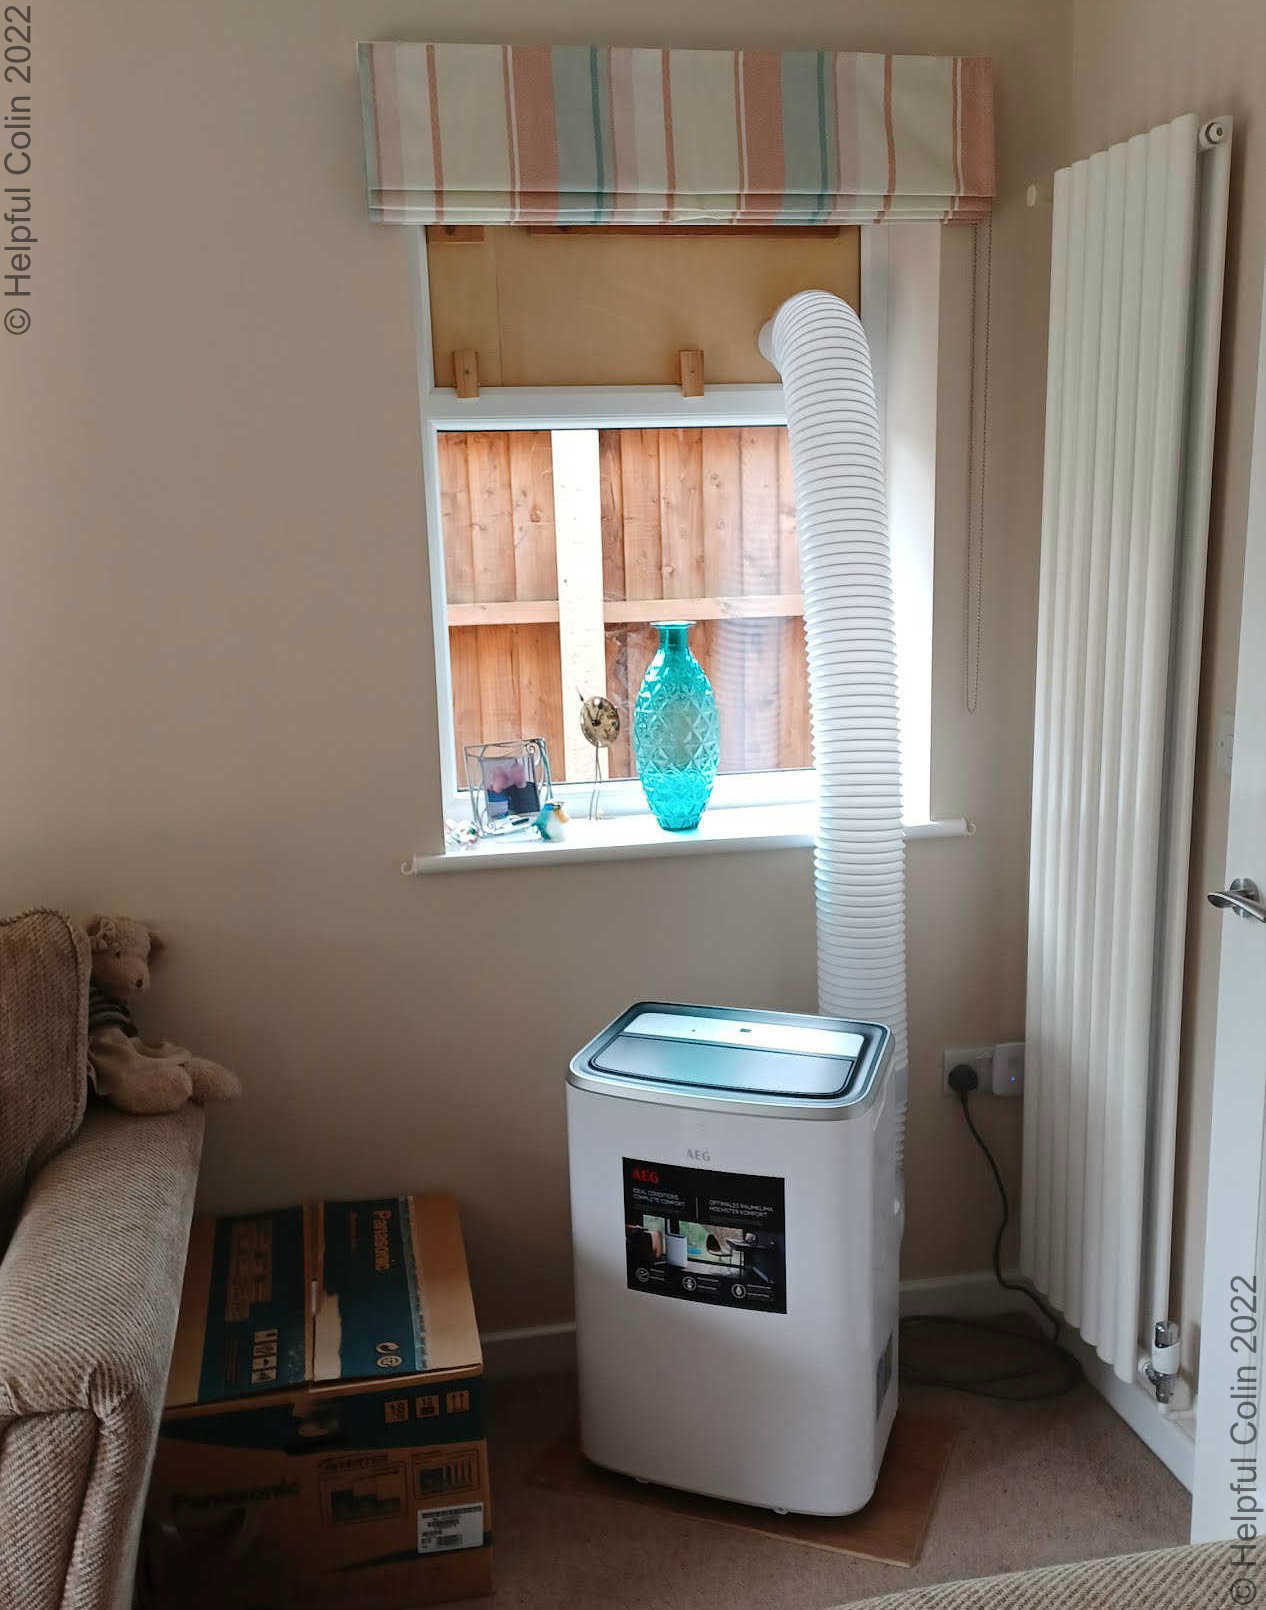
Below is a labelled photo of the completed baffle installed in the window frame as seen from inside the room.

I thought I’d only need a central toggle because the plywood was bowed out and I took advantage of it. The one central toggle pulled the centre in towards the frame, sealing it all the way along the bottom edge.
I have since found a problem pushing the pipe terminal into its oval hole with the baffle fixed in place. The plywood is really too flexible and requires some support while the insertion takes place.
The picture below shows the outside view of the baffle placed in the smaller of the two windows.

Fitting The Exhaust Pipe Baffle Into The Large Transom Window
For the larger window I soon resolved the baffle flexibility problem. I glued an “Extra Strip of Wood” along the edge of the baffle extension piece. I then mounted the baffle extension piece on the same end of the window as the oval terminal hole. This lets the extra strip of wood support the end of the main baffle from the outside.

See pictures of the baffle with its extension fitted in the large window below.


I managed to do all the installation work in advance of the UK’s first high temperature weather warning. In the event the portable air conditioner worked well in both types of window. There was a second heatwave into the low 30’s (°C) later in August 2022. So I used the portable air conditioner for a second period that month.
Leave a Reply