Preface
This post describes: How I spent a day fixing shelf battens for two shelves in a house. The walls were old and not solid brick as expected. The walls crumbled when I drilled into them so I had to repair them and drill again.
Introduction
I found myself fixing shelf battens to old walls for someone. They only required two supporting battens at each end of each shelf, but the job took much longer than expected. Why? The Victorian house walls on which the battens were fixed were crumbling underneath the plaster. This severely hindered the normal process of drilling holes, tapping in wall anchors and screwing in screws.
NOTE: This work required an assistant to provide another pair of hands to hold pieces of timber in place from time to time.
Preparing The Battens
The battens were made from planed pine wood 20mm thick from a DIY shop. The length of each batten was the same as the shelf width (the width of the two boards forming the shelf). I went through the normal process of drilling and countersinking each batten for 2 × 3 inch (75mm) number 12 screws. The holes were 7/32 inch (5.5mm) drilled 50mm from each end of the battens.
Positioning The Battens On The First Wall
I marked one wall with a pencil at the required height of each shelf, i.e. top of the batten/bottom of the shelf. Then I aligned the battens with the position I had marked on the wall using a spirit level, marked a line on the wall level with the top of each batten, and marked through the holes with a thin screwdriver by pushing it into the plaster. I drew a 1.5cm cross at each screwdriver mark so I knew where the centre should be during the drilling process. With a cross drawn, any wandering of the drill bit can be seen and maybe corrected with sideways force on the drill while drilling.
Drilling The First Wall
I then proceeded to drill the holes with a hammer drill only to find there was no solid wall, to speak of, beneath the plaster. There was just a lot of sand which I think was really the mortar holding the bricks together or the rendering under the surface plaster.
Method of Fixing Shelf Battens To Old Walls
My solution to this problem was to suck out as much sand and debris as possible through the hole in the plaster with a vacuum cleaner. Then fill the void with ready mixed filler through the same hole in the plaster. I then pushed a plastic wall anchor (plug) into the filler before it set.
Manoeuvring The Wall Anchors
A thin screwdriver had to be pushed into the wall anchor through the wall anchor screw hole to move it about. I had to make sure it was in position and at right angles to the plaster surface. This was done using sight alone.
Most of the wall anchors were fixed in place like this. I let them set for an hour or more. Ideally I would leave them for half a day but I only had one day to do all the work.
Fortunately this type of ready mixed filler sets when it dries. The brickwork and plaster absorbed the water from the filler to help it set quickly.
Fixing Shelf Battens To The Walls
When I was happy that all the wall anchors were firm in the wall I screwed the battens in place while checking them with a spirit level. Battens can be aligned horizontally with a spirit level and a little tap from a hammer, with a block of wood to cushion the blow, just prior to tightening the screws.
After tightning the screws the battens are held to the wall by the friction between the wall and batten. Without that friction all the weight would be taken by the screws and the battens would drop as far as they could and end up at all sorts of jaunty angles.
The diagram below shows a section through a batten and wall at the screw hole:

Cutting The Shelf Boards To Length
Once the batten on the first wall at one end of the shelf was in place I was able to cut the shelf boards to length and use them to work out where to put the batten at the opposite end.
As expected the planes of the chimney breast end wall and the opposite wall at the other end of the shelves were not parallel so the ends of the boards had to be marked and cut to fit the wall shape. This situation is shown in the Plan diagram below:

Each shelf consisted of two boards so I had to take measurements at the front and back of the shelf and in the middle where the two boards met. I used these measurements to mark out the boards which I then cut to length.
Positioning The Batten On The Second Wall
When cut, both pieces of shelf timber were lodged on the fixed batten at one end and the loose batten held against the wall at the other. A spirit level placed on the shelf board at the front of the shelf, and then at the back, indicated if the batten was at the correct height and position. Then I marked the top of the batten position with a pencil and pierced the wall with a screwdriver pushed through the batten screw holes, as before. This method of determining the batten position is best done with an assistant, which I had.
A diagram showing the levelling of a shelf is shown below. Note how the spirit level at the front has the bubble to the right indicating it is too high at the right end. To resolve this the batten must be lowered at the front. If it’s not too far out it might be possible to loosen the front screw and tap the batten down. If it’s a long way out of line more serious action will be required such as filling the wall hole after removing the wall plug and re-drilling it.

Fixing Shelf Battens In The 2nd Alcove
The holes I drilled in the 2nd alcove for fixing shelf battens were no better than the first. So, I had another delay while I fixed wall anchors in place.
Eventually I was able to screw the battens to the wall. Battens can be aligned horizontally with a spirit level and a little tap just prior to tightening the screws. If the tap is to be made with a hammer then a block of wood must be interposed between batten and hammer to prevent denting.
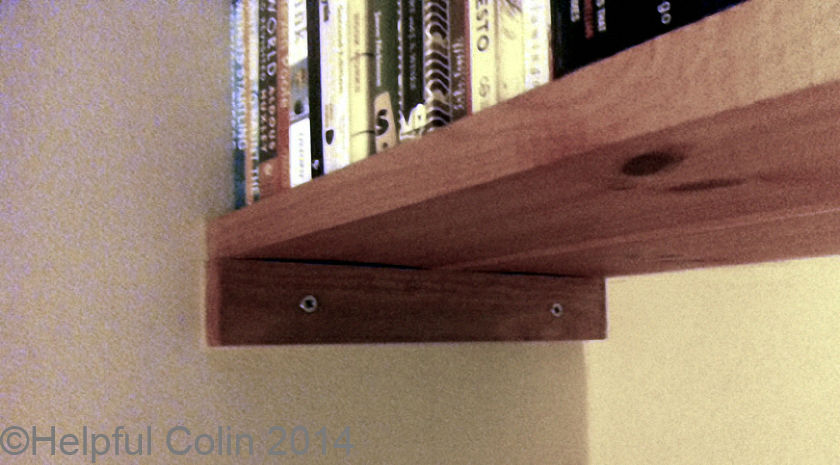
These shelves were made from 25mm thick boards not chipboard. This means they won’t sag too easily but can suffer from warping. The timber already had a bow from side to side and a bit of a twist from end to end. This was resolved with two screws at each end to pull the timber down onto the battens. You can see the final job below:

Alternative Methods of Supporting The Shelf
Normally I would support a shelf like this with three battens (at both ends and the back) and maybe a rail at the front, especially if the shelf was made from plywood, MDF or another composite board. Many shelves are made of a chipboard based material or plywood. With three battens and a rail, a shelf made of ¼ inch plywood would have supported these books well, but my client required a retro style shelf.
Fixing Shelf Battens And The Front Rail
I would fix the batten at the back of the shelf first and then the two side battens under the ends of the shelf. For the rail I might screw it to the front of the side battens and apply wood adhesive as well. Else I might make a half-lap joint at each end of the rail so that the rail was resting on the side battens. Then I would screw the rail in place by drilling the rail and putting the screws in from the top of it. I might glue it if I thought it would not need to be dismantled.
NOTE: Half-lap joints are usually visible and look unsightly even when painted. So why not use a Blind Half-lap joint?
Levelling With A Spirit Level
If I’d used three battens and a rail I would have marked the wall with a level line along the tops of the battens. With a rail in place at the front I would have been able to check my levels by resting my spirit level on all battens and the rail. When They were all level I would fit the shelf in place.
Applying A Shelf
If it was a ¼ inch plywood shelf I would make it permanent and glue the plywood to the battens and rail and hold it in place with panel pins. I might use brass pins if I thought steel would go rusty in the environment.